Monday, 19 May 2014

Big progress!

Quite an eventful time since my last update. I completed the second half of the plaster mould for making the intake manifold runner wax plugs. Unfortunately, of all the words I could use to describe the first trial, ‘successful’ does not even register! From my previous experiment, I learned that the mould needs to be warm otherwise the wax chills too quickly and leaves a very poor surface finish. This time around, I discovered that the plaster was so absorbent that is ‘drank’ virtually all of the liquid wax before it could freeze. As well as failing to make a wax plug, this meant that the mould surface was now waxy and I could not get any sealant to stick to it! I therefore had to rethink the all-plaster method and reverted back to the silicone and plaster ‘mother mould’ technique. This time however, I used a higher hardness silicone that holds its shape much better than the first material I trialled. Building on the first all-plaster mould, I also revised the closing box shape to lose a lot of the unnecessary volume. This made for a lighter part to ease handling, as well as minimising the face area of the tool, thereby reducing the chances of debris getting caught between the two halves and distorting the cavity alignment.

I started the mould by creating a wall around the plug into which I poured the silicone. This takes 24 hours to cure, then I added the registration markers (the black 'dots') and assembled the wooden case for pouring the plaster.


With this part cured, I could de-mould it, turn it over then apply Vaseline as a release agent to the first silicone half. I then built a a further plasticine wall before pouring the second half of the silicone


After 3 coats of mould release 'soap' to act as a barrier, this could then be boxed up to pour the second half of the plaster.


Finally, the mark 2 version of the mould is ready. I left it a week (with the two mould halves bound together to minimise distortion) allowing the majority of the moisture in the plaster to evaporate.


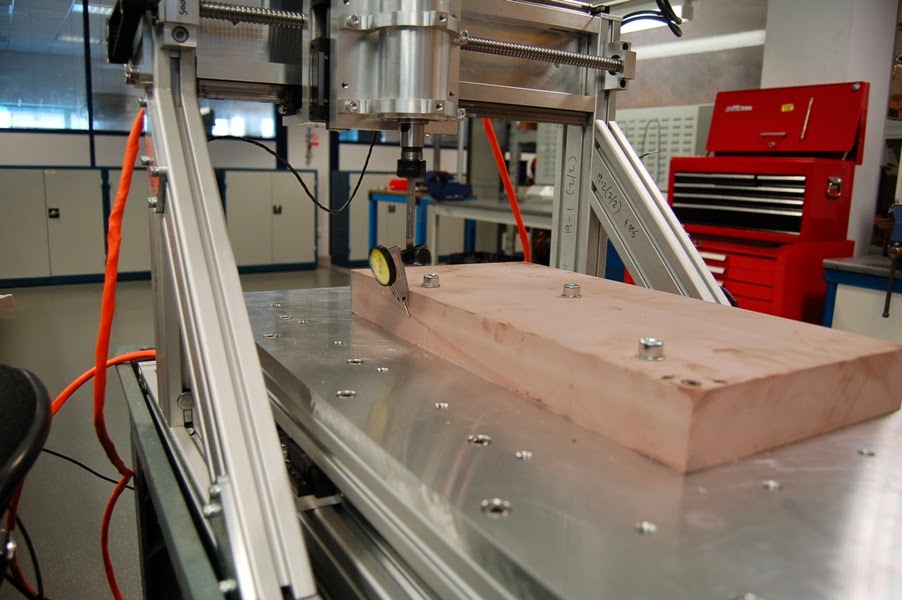
Nothing left now but to pour in the wax and hold a piece of dowel in place to act as a handle


The first part out of the mould  did not have a great surface finish, mainly due to the moisture still present in the plaster part of the mould condensing inside the cavity (despite the week I gave it to dry out). Further wax parts have greatly improved upon this as the plaster has dried out even more

With a usable wax master, I have been able to lay up a trial carbon fibre runner with a schedule of 2 layers of gel coat followed by 4 layers of carbon sleeve covered in a coated heat shrink tube for consolidation, all cured at room temperature. The post cure cycle (vital for parts exposed to elevated temperatures) even allowed the wax core to melt out as planned. There were a few cosmetic issues with this first part – a couple of runs in the gel coat and learning the best way to apply the sleeve layers – meant a less than ideal weave pattern on the outside. In addition, the heat shrink is very thin and therefore was a little tricky to work with (i.e. I burned a couple of holes in it before I turned down the wick on the heat gun!). This, along with the less than ideal internal surface finish from the first off wax, meant this was a sacrificial part only suitable for cutting up to see how well the composite had been laminated. I am pleased to report only a few small inclusions in the thickness of the wall and a couple of bubbles under the gel coat which should be avoidable with better consolidation between applying layers of sleeve. I have enough materials for a second trial (along with the 8 ‘good’ parts needed for the job), but hopefully I won’t need to cut up another one! Eight more to go then.


Other big news is that the body shell is finally complete and last week I travelled up to Newark to collect. I am very pleased with the colour combination and the photos don’t do it justice – bear in mind it is straight out of the mould with no polishing. Unfortunately, in all the excitement of getting it off the back of the Luton van (thanks for the additional muscle power, Neil!) I neglected to get a proper picture of it. The body will remain on its stand whilst I work inside the engine bay, then It can be mated with the chassis before carrying on assembly. I should then be able to get a good photo or two when it rolls out into the sun light as a (sort of) complete car!


First job is to apply stone chip to the inside of the wheel arches. Not the most glamorous of jobs, getting spattered in liquid rubber and cross eyed from the fumes, but 2 coats later, it is complete.


Next up is the fitting of the various panels - 2 in the wheel arches, bonnet and boot. This should keep me entertained for a little while!

Tuesday, 1 April 2014

Plug Progress!

A bumper update of photos this week! Recent progress has been centred around starting the composite work for the intake manifold. To this end, I have finally plucked up the courage to run my milling machine in anger. I have started by cutting the plug for the intake runner (1 per engine cylinder) from polyurethane tooling board which is quite a nice material that machines like a block of car body filler (Bondo to subscribers across the pond). A rough and finish path on either side of the block then it is a simple matter of cutting the supports away and cleaning up the stub left over.

This is a 2-sided part so alignment of the block to the machine is critical. This ensures that both tool paths line up when the part is broken out of the block. To this end, I used a finger clock to align the long axis of the part with the x-axis of the machine. Not an easy task given the less than ideal surface along this face!


I could then use an edge finder to zero the machine on the appropriate corner of the block


A rough pass saw the part taking shape


Finishing the first side, then roughing and finishing the second side (after repeating the alignment procedure) yielded a part ready to break out of the block. The more astute amongst you will notice the patches of lighter coloured material. During machining, the Z-axis (spindle up and down) come loose on me due to poor pulley alignment, causing the z-axis to loose its location. Fortunately, a bit of car body filler and locally running the finishing path allowed me to recover the part.


There is a 'pencil cleanup' option in the tool path generation software that supposedly would allow the machine to cut the part away from its supports, but I chose to do this manually on this occasion until I have a bit more confidence on using this option. I didn't want to write off a few hours of work at this point! I used a burr bit in a dremel to remove the supports and a quick clean up with 120 grit paper and I had the makings of my runner plug


Once machined, I had to apply the top coat to the plug in order to arrive a finish that could take a polish. This is not strictly necessary on this part since the down stream processes are unlikely to reproduce the finish exactly, but I felt it would be good practice in using the materials and techniques.

The finish comprises a couple of coats of tooling resin which is a 2-part coating that cures to a hard finish suitable for polishing. It is applied by brush (or spray if available), then cut back with progressively finer grades of wet and dry paper, ending in 1500 grit. I used black guide coat to ensure I had passed over the entire surface with each grade. The screws in the ends simply allow me to hang the part when the various layers a drying.


Then a switch to poilishing compound and a few coats of mould release wax for good measure.


With all of the master pattern finishing complete, I could turn my attention to the plaster mould. The split line on the part is particularly challenging as it is curved in two directions and since I was using a semi-hard tool, I would need to replicate it quite accurately, otherwise I would lock the part in one half of the tool. I finally figured out I could create a 3D CAD model of the required split line, then flatten it to provide a pattern which I could use to cut out pieces of thin styrene sheet.


This was flexible enough to form along either side of the plug, which would then guide the application of plasticine to form the sacrificial tool face. The remaining plasticine structure was formed and a number of domes were located to provide tool half to tool half alignment


. I could then form the shuttering around the part and pour the plaster.


Once cured, The shuttering and plasticine was removed, then the plaster trimmed back and cleaned up. Half way there!


From here, I will need to apply a release agent to prevent the other half from attaching itself during curing, rebuild the shuttering, then pour the second half of the tool. This will take a week or so to dry fully before I can use it in anger to make my wax plugs.

In the mean time, I have completed a couple of small jobs for the car itself – I have finally terminated the fuel lines with appropriate fittings. This involves a compression fitting on the pipe itself, which presents an ‘AN dash 6’ female thread, which in turn is converted to a typical push fit fuel line connector (with the red caps / masking tape plugs in the pictures). From here, I will need to make up the flexible lines, but they will have to wait until the body is installed.


I am still wanting for a confirmed collection date on the bodywork, but it should be ready soon. I still have plenty to keep me occupied in the mean time!

Monday, 10 March 2014

Still chipping away!

Despite the distinct lack of updates, I have been making some progress on the build. Since my last missive, I have test run the CNC milling machine and for the most part was pleased with the result. I was able to successfully use the MeshCAM software to convert the 3D CAD model to G-Code (the language that the milling machine uses), run the spindle off the power supply that was recued out of a skip and the motion control (from PC signal to stepper motor drive) worked faultlessly. Unfortunately, there was an issue with the overall stiffness of the machine that meant the surfaces finish left a lot to be desired when cutting aluminium. I identified two major routes to improve the situation – one was to increase the torsional stiffness of the gantry, the other was the lateral stiffness of the bed. In addition, I have replaced the spindle motor with one which includes an integral cooling fan which will allow better continuous operation. These modifications have now all been completed and the second commissioning run is anticipated this week.

Other progress has been centred around the manufacturing method of the intake manifold. The manifold runners are essentially tubes of tapering cross sectional area, morphing from a rectangular to a circular cross section and sweeping around a path with a number of bends. Using conventional lamination methods would require two halves of the runner to be moulded, then joined (typically by a reinforced glue joint). I felt this was a risky strategy because the vibration, pressure pulsations and temperature loads may well lead to failure of this joint. I therefore needed a method of laying up a complete tube in one go. Despite my best google efforts, I have been unable to find someone who has published something similar so I have had to invent a method for making these parts. This involves a ‘lost wax’ lamination method where a sacrificial plug of wax is moulded then the continuously woven carbon fibre sleeve can then be laid up over it and consolidated with heatshrink tube. Once cured, the wax can be melted out of the part during the post-cure process of the resin.

The first job for the improved milling machine will therefore be to cut the plug that will be used in the carbon fibre runners in the intake manifold, but before I can do that, I needed to establish some shrinkage values. The wax I intend to use is typical paraffin wax used in candles which can have anything up to 3% shrinkage during cooling, this combined with the 0.5% shrinkage of the resin lay up and whatever method was used to cast the wax in the first place would have a noticeable effect on the finished part dimensions. I therefore decided to build a sample mould to measure the actual shrinkage, to be able to compensate in the plug dimensions. My chosen method for this was a ‘mother’ mould involving a silicone tooling layer, combined with a plaster outer shell for rigidity. I marked a piece of plastic rod with two grooves a know distance apart and created the mould. I could then pour molten wax into this mould and once cooled, measure the corresponding ridges in the silicone and grooves in the wax part. 


With the end grooves aligned, the shrinkage of the wax (on the right) can be seen against the original nylon (left).


The end result of all this was 0.5% shrinkage of the silicone, and 1.6% shrinkage of the wax. I also learned a couple of valuable lessons this moulding technique in that my original mould had insufficient keying between the two halves leading to a mis-match in the wax (I suspect a higher Shore hardness silicone would improve the situation), along with the need to pre-heat the mould before pouring the wax otherwise a poor surface finish results. Given the relative simplicity of the shape required, I have therefore decided to make the ‘production’ mould from a grade of casting plaster which will pre-heat well and the two halves can be made to lock together more effectively than the silicone. With the shrinkage values established, I should be machining the plug shortly, thought the finishing will take a little while longer as this will be inner surface of the runner and a good polished surface will help with overall performance.

As for the car itself, I have been wrapping up the last few jobs on the chassis assembly. On the rear axle, I have installed the springs and dampers, though these required a series of spacers to be machined due to clearances in the chassis bracket around the upper fixing.


The front springs and dampers are a simple case of bolting up to the waiting wishbones


Having the springs and damper allowed me to carry out the bump steer measurement and correction. A picture paints a thousand words, so a video must do that exponentially. I used method 3 (Rowly Method) as per the Pilgrim Sumo Wiki: measuring-bump-steer

I have cleaned and re-built the handbrake and attached the hand brake cable to the appropriate levers on the callipers.


In addition, I have procured the radiator cooling fan (a 16” unit from Kenlowe to be mounted behind the radiator) and fabricated the mounting brackets. These were simple pieces of sheet metal (laser cut for simplicity), folded, then 6mm bolts welded in (with their heads ground down to a minimum thickness). I have carried out a test fit, and will paint or powder coat them in due course.


Other chassis progress has been the procurement and fitting of the steering shafts and universal joints. The upper steering shaft needed the paint removing before the rose joint could be slid on and I need to wait until the complete column is fitted before establishing the final position of the support on the shaft. I will then be able to fix the rose joint and paint the remaining exposed steel.


The other big news is after much deliberation, sample trials and general indecisiveness, I have finally arrived at a specification for my body shell! I will be having the body in gel coat, partly for cost reasons, but mostly because the gel will be much thicker than any paint and therefore will be much more resistant to stone chips and easier to repair. I was not comfortable making a colour decision based on a small sample swatch, so ended up laying up a 12” square of each of the short list colours before the final decision. Unfortunately, you will all have to wait until the body is collected before you get to see the grand unveiling, but I should be in possession of the complete body within a few weeks. Can’t wait!

Monday, 23 September 2013

Just like buses...

...nothing for ages, then two updates together!

Some of the smaller jobs ticked off the list most recently include finally finding a solution to the thermostat housing problem. Having bought two aftermarket versions (which although nice and shiny, did not fit), I thought I would throw caution to the wind an source a genuine Ford part. Low and behold it dropped straight in with no issues! The only modification I needed was to drill and tap the optional fitting in the top so I could fit a secondary temperature sensor. This will be the sensor to drive the temperature gauge whereas the sensor in the normal position in the manifold will be reserved for the Engine Control Module. It is possible I could have used a single sensor for both, but there were potential buffering and ground loop issues having two processors reading the same sensor so I thought in the interest of fault diagnosis, two was better than one.

Carrying on the sensor theme, I have sourced an oil pressure sensor that GM use on their LS series of engines, and machined up an adaptor to allow connector to the normal ‘idiot light’ switch position on the engine block. As usual, nothing is ever that simple, and clearance to the block meant that the sensor would not simply screw into the same position, so the adaptor also had to relocate the sensor to a remote location. Fortunately, Ford have provided a suitable threaded boss in the water pump for just such an occasion. A short braided hose was also required to connect the two together, so another skill of hose assembly was learned.


The other sensor fitted recently was to read oil temperature. Once again, Ford have been kind enough to provide an easy route in the form of a  secondary drain plug in the sump. This is used to get all of the oil out that would otherwise be trapped by the ‘hump’ of the oil pan that clears the sub frame normally running under the engine. I was able to reverse engineer the thread used on this fitting and machine up an adaptor for the sensor. It is not at the lowest point on the chassis but it is still a little vulnerable, so this will get some kind of skid pan to protect the connector and wiring.


Since the sensors will be read by a microprocessor, I have not been able to use the more typical 1-wire senders as the earth path through the block typically affects the measurements. I have therefore had to use 2-wire sensors which are more difficult to come by, and even harder to find suitable data sheets. Fortunately, the GM LS engines are used quite a lot in aftermarket installations (they will sell a whole crate engine if you want), and more data is available on the spares. I therefore have a Ford engine, but controlled and monitored using GM sensors – fingers crossed they will work together without getting into a fight!

Other progress has been the fitting of the clutch slave cylinder and making up the braided hose for the hydraulic line and I have now collected the rear part of the exhaust from Gardner Douglas. This connecting pipes will need modifying (or replacing) to meet up with my own design headers, but it gives me a head start in terms of known good routing under the chassis and bodywork.


As for the milling machine, I have now connected the motors to the various slides and successfully run through a sample program. There are a couple of parts to finish on the spindle drive and I will then be in good shape to start test cutting.

Tuesday, 17 September 2013

I'm still here and chipping away at it!

Updates have been conspicuous by their absence for most of this year, mainly because of the lack of progress on the car. Work and other commitments have meant I have not been able to devote much time to the build, but I have not been totally idle on the Cobra front.

A big part of the build is the intake system I have been designing and in order to manufacture it, I will need a number of custom aluminium parts along with plugs and moulds for the carbon fibre work. I took a long look at the economics of this and decided the most cost effective way forward was to develop the capability of machining these parts myself. To this end, I have spent most of the intervening months (and budget) designing and building a bench-top 3 axis computer controlled milling machine. This doesn’t have the precision or power of commercially available machines, but my aim is for it to match or beat the tolerances of sand cast parts when machining aluminium and produce the highly contoured plugs for the composite work with far more precision than I would otherwise be able to achieve.

The machine is substantially built and I am currently in the process of commissioning it. I have had all three axis motors spinning under the control of the computer and the next stage is to connect them up to the slides on the machine and get the various parts moving. There are a couple more components to manufacture in order to complete the spindle, and then it should be ready for the first test cuts.


I have had to refresh myself in the programming language used by these machines (G-codes) as I have not used it since University and I am getting up to speed on the software used to convert a 3D CAD model into a tool path. The initial parts will therefore be less than startling, but hopefully I will get the hang of it quickly and the important (i.e. more noticeable) parts will be fully ‘Cobra Spec’!