A bumper
update this week thanks to the long weekend. Since receiving the chassis and
borrowing a spare bonnet from the kit manufacturer, I have been working away at
creating a CAD model. This was finished up to the necessary level ahead of the
weekend so I could break out the tools and start building!

The build
manual recommends assembling the rear axle off the chassis, then lowering the
framework around it. This seemed like a sensible approach, so I made it the
first task as manoeuvring a bare chassis sounded easier than moving a partially
assembled one. The rear axle is straight out of the donor Jaguar with the lower
wishbones pivoted off the differential. This means that the pivot mounting
brackets determine the toe and thrust of the rear wheels and have to be
carefully aligned with shims. The brackets that hold the assembly into the
chassis are drilled to provide the correct alignment (in theory), so I set
about mocking up the pivots to determine the correct shims. I will still have
to measure the alignment when the axle is complete to finally check the toe and
thrust measurements, but this should give me a good start.

With the shims established, I could fix the lower pivot brackets and make my first attempt at lockwiring the bolt heads, which proved easier than anticipated (when you wrap the wire the correct way around the bolt head!).

The rest of the rear axle assembly continued as per the Haynes (Chilton) manual including shimming of the rear brake discs (rotors) to centralise them in the callipers and assembly of the rear brake callipers. The assembly of the inner pivot tubes proved to be fun thanks to the multitude of spacers, thrust washers and seal retainers, but the liberal application of grease held everything together long enough to assemble the pivot shaft without a pile of bits on the floor!

At this stage, the driveshafts and rear uprights would be fitted, but as I am still waiting on parts to complete their assembly, I moved on to fitting what I had to the chassis. This was simply a case of lowering the rear of the frame over the assembly and fitting 8 bolts.


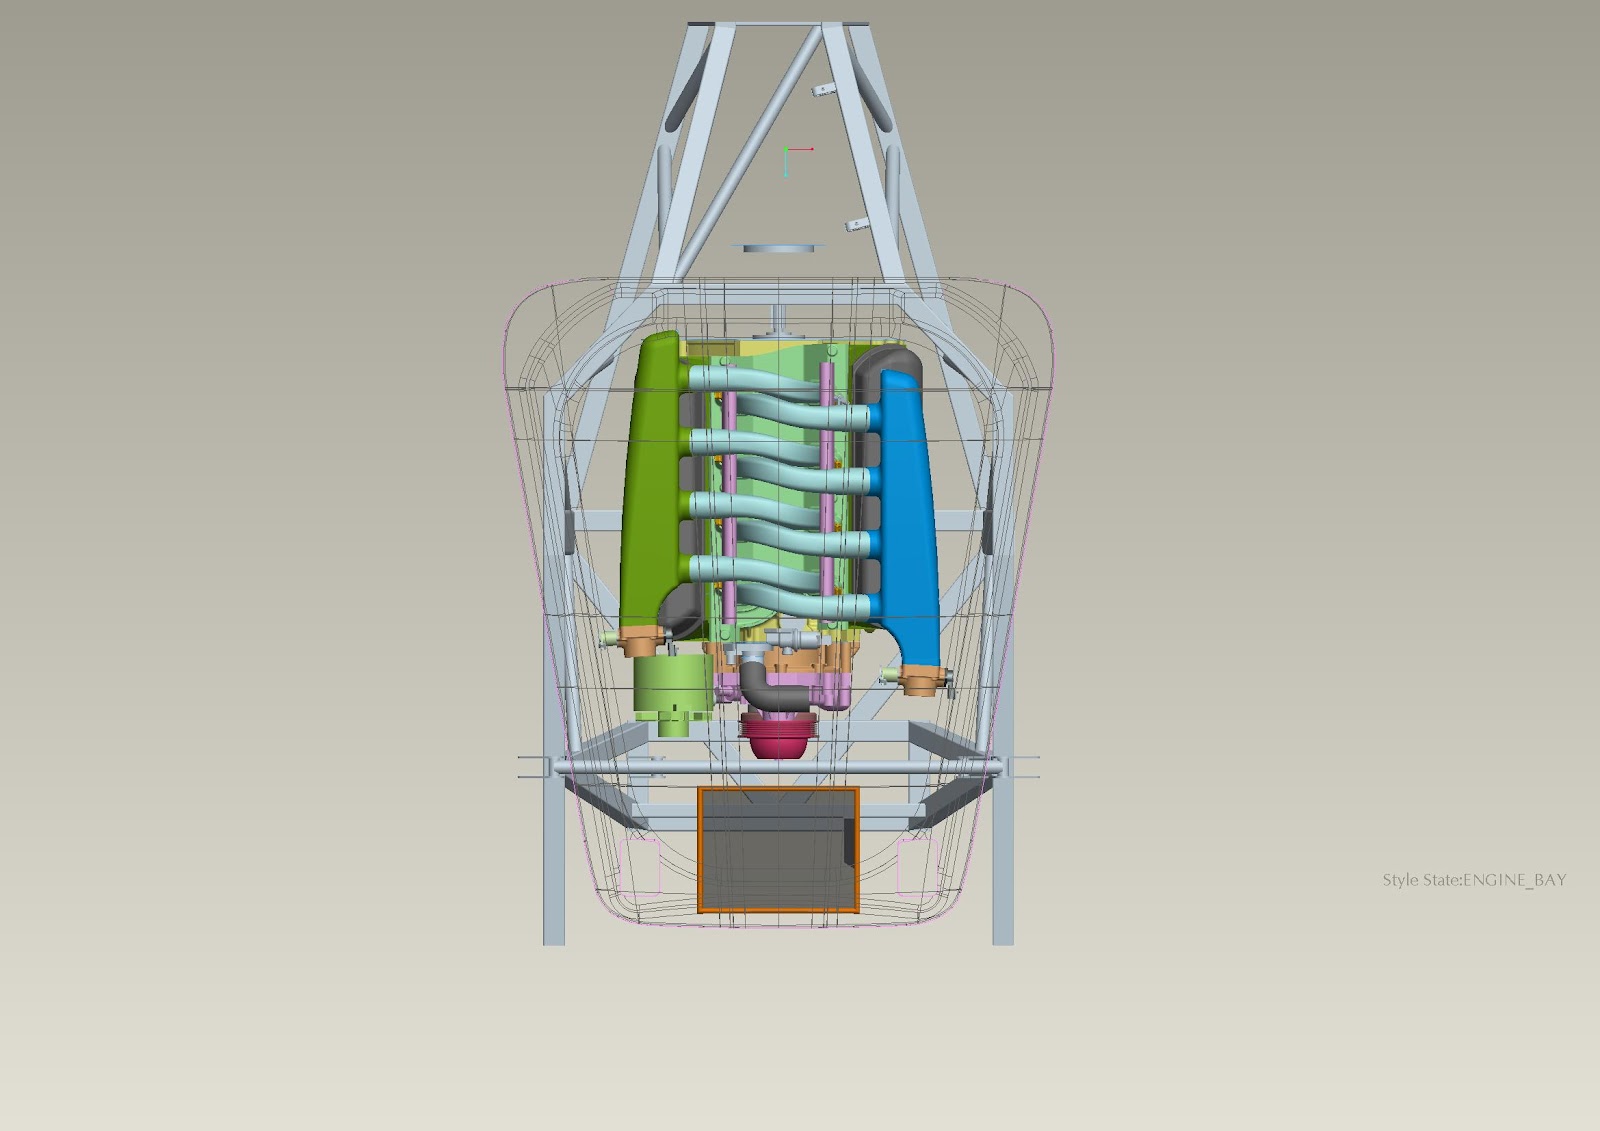
With the rear assembly as complete as I could make it, I moved onto preparation for engine installation. This involved fitting the two fuel lines (feed and return for the injection system) along with the brake pipes. The fuel lines were installed using brackets I designed and a work colleague machined for me (thanks Colin), held in with rivnuts.


The brake lines use a series of push-in clips and these (along with the fuel line clamps) have to be spaced to provide sufficient support as this is inspected at the Individual Vehicle Approval (IVA) test. Most of the fitting was relatively straightforward, however the front brake pipe proved more challenging due to the tortuous route under the engine mounting bracket. Two sore thumbs later and I was ready to fit the engine and gearbox assembly.

The chassis design allows for excellent access for this job and the only hindrance was a lack of manoeuvring space for the engine crane. It turned out to be easier to lift the engine up and slide the chassis under it before rolling the crane (and engine) into place. The engine mounts were bolted into place and the powertrain was in its new home. The gearbox tail housing is currently sat on a piece of wood until I can fabricate the rear mounting bracket.


With the engine installed, I was able to turn my attention to the front suspension. As per the rear axle, this is lifted straight from the Jaguar donor and bolts up to the chassis in the same way. The only real deviation is the bespoke steering arm to suit the new rack as well at the omission of the various shields. This concluded my weekend of construction – not bad for a few days work!

There is still some work to complete the front suspension assembly – making up a new pair of rigid brake pipes from the calliper to the flexible hose as well as setting up the front angles – camber, castor and toe. The geometry will be much easier to work on when I have the steering rack so this will have to wait for suitable funds! At least I can amuse myself with designing the intake system in the mean time.
No comments:
Post a Comment